Sourdough seems to be overly complicated sooooo much. It’s not that hard. And people back in the day most likely didn’t discard. If you’re a baker, I understand why you want to be precise. But if you’re baking fresh, delicious bread for your family, you don’t have to be crazy about it.
The reality is that dough is dependent on many factors. It’s dependent on the temperature of your ingredients. Also, dependent on the temperature of your kitchen. It’s very much dependent on how sour you like the dough to be as well.

I do not like my bread super sour. I don’t personally enjoy focaccia bread for that very reason. But, I do like my bread to be crusty, and risen enough to not be flat (obviously).
So, this recipe is for those who are over the hype of being dramatic about sourdough. It’s for us who just enjoy fresh, delicious bread without the headache.
Tips:
- Watch your dough. If there are tons of bubbles, then it’s going to be VERY sour. If it’s risen or close to doubled in size, yet it’s not super bubbly then it will not be super sour.
- The timing is always a recommendation because it’s mostly about THE RISE. We can all set timers in the recipe. But all of those factors will change the outcome based on the things I’ve mentioned above.
- I also don’t have any of the extra tools that you “have” to have. I use a metal bowl, a wooden spoon, plastic wrap, parchment paper, and a Dutch oven. No bread proofing baskets.
- I also use a sharp, straight-edged knife to score. Works well for me, you use what you’d prefer!
My second-oldest enjoys this bread mostly with butter and salt. I enjoy it with olive oil and balsamic vinegar. This bread is great for dipping in soups, making sandwiches, and just enjoying it fresh.

Ingredients
Equipment
Method
- In a bowl, add your sourdough starter, flour, salt, and water, and mix with a wooden spoon.
- Then, once mixed with the spoon, knead the dough for 2-4 minutes.
- Cover the dough with plastic wrap and allow to sit for 25-30 minutes.
- Do one set of stretch and folds. Go in a circle around the dough, pulling on one end of the dough and holding it up, and then pulling that piece back to the center of the dough. Continue doing this all around the dough. I do this about 8 times. (That's one stretch and fold session.)
- Allow the dough to sit another 25-30 min, and do one more session of stretch and folds.
- Allow the dough to rise on the counter for 8-10 hours. The warmer the spot, the quicker the dough will rise.
- Once the dough has risen and grown in size, place your dough on a well floured surface.
- Stretch the dough out into a rectangle. Roll that rectangle as if you're rolling cinnamon rolls. Then roll once again into a ball.
- Then pull the outsides of the dough in. (This will be the bottom of the dough.)
- Add your olive oil to that same bowl you used before. Then place your dough in there faced down and cover.
- Place that bowl into the fridge for 12-15 hours.
- Preheat your oven to 500 degrees Fahrenheit.
- Add your Dutch oven in there while it's preheating. After it's preheated allow the Dutch oven to be there an additional 10 minutes.
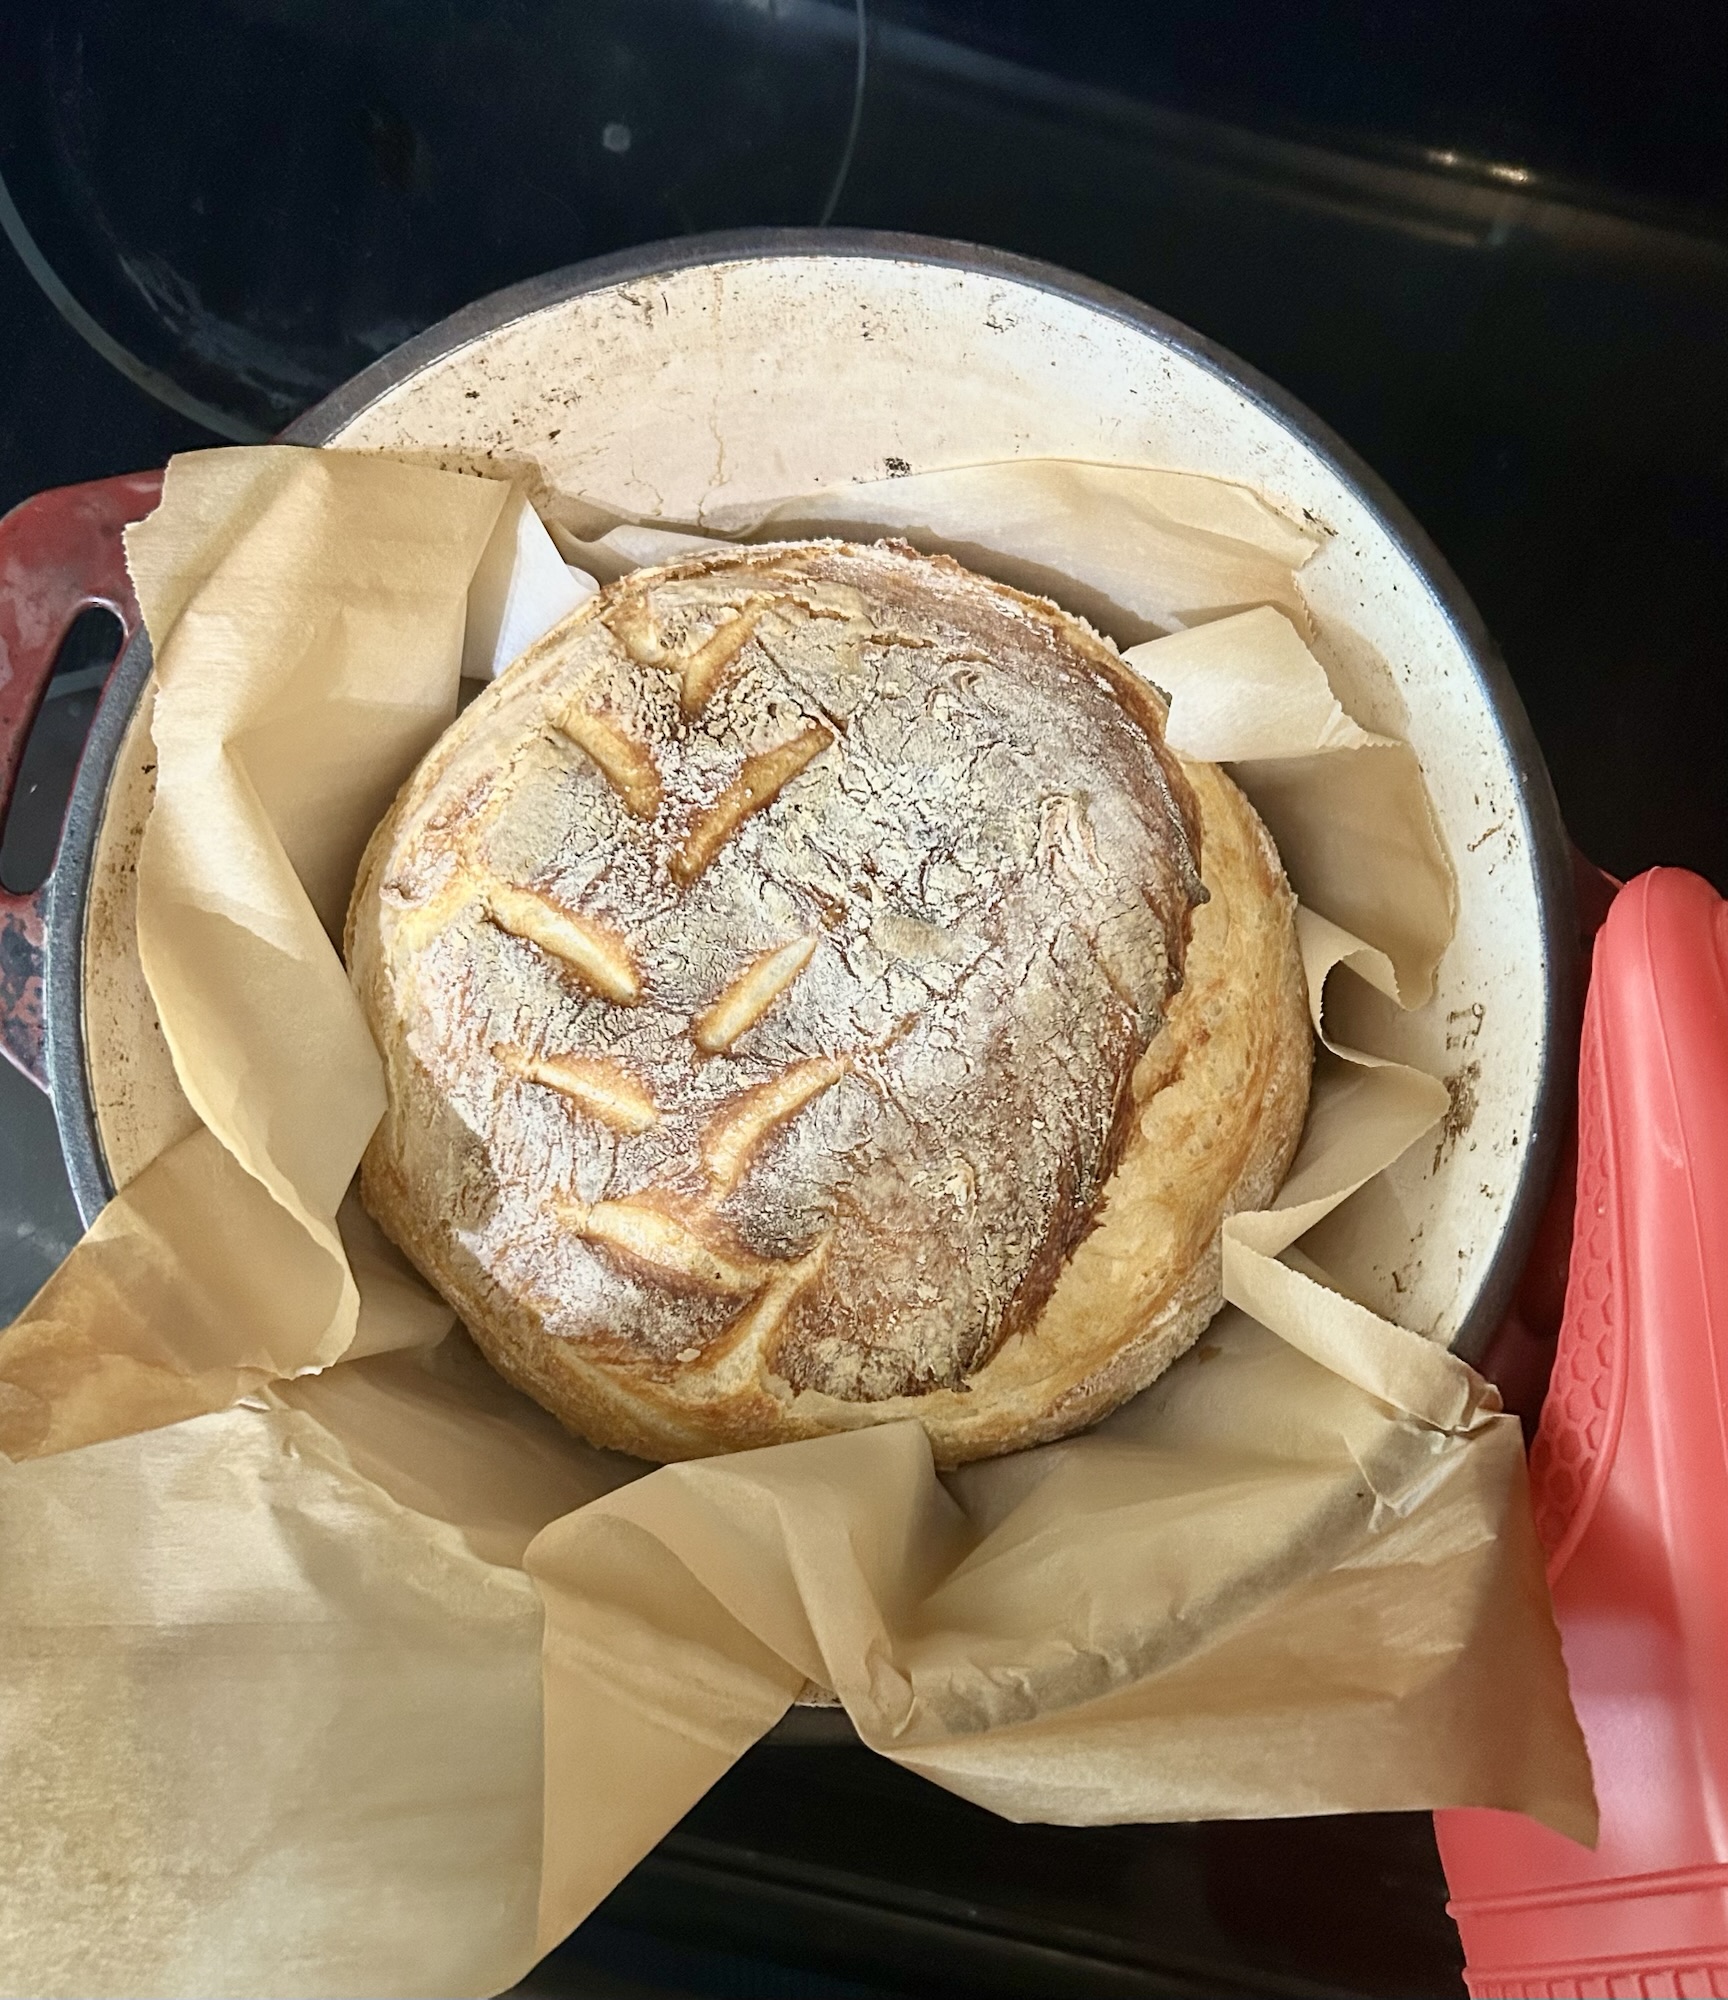
- Prepare a piece of parchment paper sized for the Dutch oven. Place your dough right-side up in the center of the parchment paper. (I simply plop my bowl upside down onto the parchment paper, and the dough falls out.
- Dust your dough with flour and score the bread. One large slit, and then smaller if you want to design.
- Place the dough with parchment paper into the Dutch oven and place into oven lid on for 20 minutes.
- Then, turn down the temperature to 475 degrees Fahrenheit and remove the lid. Allow the bread to cook for an additional 12-15 minutes. Enjoy!


Leave a Reply